Razorpay Django Integration: Secure Payment Gateway with Signature Verification
Integrating a payment gateway is a rite of passage for full-stack developers. In the Indian tech ecosystem, Razorpay is the undisputed go-to payment gateway. However, integrating it into a Django project requires a solid understanding of both backend security and frontend event handling.
The biggest mistake junior developers make is trusting the frontend. Never trust the frontend to confirm a payment. A savvy user can manipulate JavaScript callbacks. The only source of truth is Razorpay's server talking to your server.
Here is a complete, production-ready guide to integrating Razorpay into a Django project, complete with the secure backend verification flow.
The Architecture of a Razorpay Payment
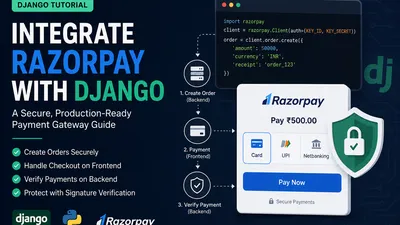
Before writing code, you must understand the flow. It happens in three distinct phases:
- Order Creation (Backend): Your Django server tells Razorpay, "I want to collect ₹500." Razorpay creates an Order and gives you an
order_id. - Checkout (Frontend): You pass this
order_idto the user's browser. The Razorpay JS library opens the popup, the user pays, and Razorpay gives the browser apayment_idandsignature. - Verification (Backend): Your Django server takes those three IDs, asks Razorpay "Did this actually happen?", and if verified, marks the database order as paid.
sequenceDiagram
    participant User
    participant Django
    participant Razorpay

    User->>Django: Clicks "Pay Now" (Initiates Checkout)
    Django->>Razorpay: Creates Order (Amount, Currency)
    Razorpay-->>Django: Returns Order ID
    Django-->>User: Renders Page with Order ID & Checkout Button

    User->>Razorpay: Enters Card/UPI & Pays (via Razorpay JS)
    Razorpay-->>User: Returns Payment ID & Signature (Success Callback)

    User->>Django: Sends Order ID, Payment ID, Signature
    Django->>Razorpay: Verifies Signature (Server-to-Server)
    Razorpay-->>Django: Verified Successfully!
    Django->>Django: Marks Order as Paid in Database
    Django-->>User: Shows "Payment Successful" Page
Step 1: Setup & Installation
First, install the official Razorpay Python SDK.
pip install razorpay
Log into your Razorpay dashboard, navigate to Settings > API Keys, and generate your Test API Keys. You will need a Key ID and a Key Secret.
Add these to your settings.py (Always use environment variables for secrets!):
# settings.py
import os

RAZORPAY_KEY_ID = os.environ.get("RAZORPAY_KEY_ID", "rzp_test_XXXXXXXX")
RAZORPAY_KEY_SECRET = os.environ.get("RAZORPAY_KEY_SECRET", "XXXXXXXXXXXXXXXX")
Step 2: The Database Model
You need a model to track the status of the payment. Notice the order_id and payment_id fields to store Razorpay's references.
# models.py
from django.db import models

class Order(models.Model):
    STATUS_CHOICES = (
        ('created', 'Created'),
        ('paid', 'Paid'),
        ('failed', 'Failed'),
    )

    user_email = models.EmailField()
    amount = models.IntegerField() # Amount in paise! (₹500 = 50000)
    currency = models.CharField(max_length=3, default='INR')
    razorpay_order_id = models.CharField(max_length=100, blank=True, null=True)
    razorpay_payment_id = models.CharField(max_length=100, blank=True, null=True)
    razorpay_signature = models.CharField(max_length=200, blank=True, null=True)
    status = models.CharField(max_length=10, choices=STATUS_CHOICES, default='created')
    created_at = models.DateTimeField(auto_now_add=True)

    def __str__(self):
        return f"Order {self.id} - {self.user_email} - {self.status}"
Run python manage.py makemigrations and python manage.py migrate.
Step 3: Initiating the Payment (Backend)
In your views.py, initialize the Razorpay client and create the order.
⚠️ Crucial: Razorpay expects the amount in the smallest currency unit. For INR, that is paise. ₹1 = 100 paise. If you pass
500to Razorpay, it will charge the user ₹5.00. Multiply rupees by 100.
# views.py
import razorpay
from django.conf import settings
from django.shortcuts import render
from .models import Order

def checkout(request):
    # 1. Initialize the Razorpay client
    client = razorpay.Client(auth=(settings.RAZORPAY_KEY_ID, settings.RAZORPAY_KEY_SECRET))

    # 2. Create an Order in your Database
    db_order = Order.objects.create(
        user_email="customer@example.com",
        amount=50000, # ₹500 in paise
        status='created'
    )

    # 3. Create an Order on Razorpay
    razorpay_order = client.order.create({
        'amount': db_order.amount,       # In paise
        'currency': db_order.currency,
        'receipt': f'order_{db_order.id}',
        'notes': {
            'db_order_id': str(db_order.id)
        }
    })

    # 4. Save the Razorpay order ID to your DB
    db_order.razorpay_order_id = razorpay_order['id']
    db_order.save()

    # 5. Pass data to the template
    context = {
        'razorpay_order_id': razorpay_order['id'],
        'razorpay_merchant_key': settings.RAZORPAY_KEY_ID,
        'amount': db_order.amount,
        'currency': db_order.currency,
        'db_order_id': db_order.id,
    }
    return render(request, 'checkout.html', context)
Step 4: The Checkout Page (Frontend)
Now, render the Razorpay checkout button in your checkout.html template. You must include Razorpay's checkout script and configure the handler.
<!-- templates/checkout.html -->
<!DOCTYPE html>
<html>
<head>
    <title>Pay with Razorpay</title>
    <script src="https://checkout.razorpay.com/v1/checkout.js"></script>
</head>
<body>
    <h2>Complete your payment of ₹500</h2>
    <button id="pay-btn">Pay Now</button>

    <script>
        const options = {
            key: "{{ razorpay_merchant_key }}",
            amount: "{{ amount }}", // In paise
            currency: "{{ currency }}",
            name: "My Django Store",
            description: "Test Transaction",
            order_id: "{{ razorpay_order_id }}",

            // This callback is triggered when payment is successful ON THE BROWSER
            handler: function (response) {
                // The user paid, but we MUST verify on the server!
                alert("Payment successful. Verifying...");

                // Send the captured IDs to Django for verification
                fetch('/verify-payment/', {
                    method: 'POST',
                    headers: {
                        'Content-Type': 'application/json',
                        'X-CSRFToken': '{{ csrf_token }}' // Django CSRF token
                    },
                    body: JSON.stringify({
                        razorpay_order_id: response.razorpay_order_id,
                        razorpay_payment_id: response.razorpay_payment_id,
                        razorpay_signature: response.razorpay_signature,
                        db_order_id: "{{ db_order_id }}"
                    })
                })
                .then(res => res.json())
                .then(data => {
                    if (data.success) {
                        alert("Payment Verified and Marked Paid!");
                        window.location.href = "/success/"; // Redirect to success page
                    } else {
                        alert("Payment Verification Failed!");
                    }
                });
            },
            "prefill": {
                "email": "customer@example.com"
            }
        };

        document.getElementById('pay-btn').onclick = function(e) {
            const rzp1 = new Razorpay(options);
            rzp1.open();
            e.preventDefault();
        }
    </script>
</body>
</html>
Step 5: Server-Side Verification (The Most Important Step)
The frontend told us the payment succeeded. But a malicious user could just trigger that fetch call manually without paying. We must verify the cryptographic signature Razorpay generates.
Razorpay creates an HMAC SHA256 signature using your Key Secret, the order_id, and the payment_id. You must replicate this on your backend and check if it matches the razorpay_signature sent from the frontend.
# views.py
import json
from django.http import JsonResponse
from django.views.decorators.csrf import csrf_exempt
from django.views.decorators.http import require_POST

@csrf_exempt # We handle CSRF via the header in the JS fetch
@require_POST
def verify_payment(request):
    try:
        data = json.loads(request.body)
        razorpay_order_id = data.get('razorpay_order_id')
        razorpay_payment_id = data.get('razorpay_payment_id')
        razorpay_signature = data.get('razorpay_signature')
        db_order_id = data.get('db_order_id')

        # 1. Fetch the Order from DB
        try:
            db_order = Order.objects.get(id=db_order_id)
        except Order.DoesNotExist:
            return JsonResponse({'success': False, 'error': 'Invalid Order ID'})

        # 2. Initialize Razorpay client
        client = razorpay.Client(auth=(settings.RAZORPAY_KEY_ID, settings.RAZORPAY_KEY_SECRET))

        # 3. Create the dictionary for verification
        params_dict = {
            'razorpay_order_id': razorpay_order_id,
            'razorpay_payment_id': razorpay_payment_id,
            'razorpay_signature': razorpay_signature
        }

        # 4. Verify the signature
        try:
            client.utility.verify_payment_signature(params_dict)

            # If no exception raised, payment is verified!
            db_order.razorpay_payment_id = razorpay_payment_id
            db_order.razorpay_signature = razorpay_signature
            db_order.status = 'paid'
            db_order.save()

            # TODO: Trigger fulfillment logic here (send email, ship product, etc.)

            return JsonResponse({'success': True})

        except razorpay.errors.SignatureVerificationError:
            # The signature didn't match. Possible tampering!
            db_order.status = 'failed'
            db_order.save()
            return JsonResponse({'success': False, 'error': 'Signature Mismatch'})

    except Exception as e:
        return JsonResponse({'success': False, 'error': str(e)})
Wire up the URLs
Finally, map these views in your urls.py:
# urls.py
from django.urls import path
from . import views

urlpatterns = [
    path('checkout/', views.checkout, name='checkout'),
    path('verify-payment/', views.verify_payment, name='verify_payment'),
]
Next Steps for Production
You now have a working, secure Razorpay integration. But to make it truly production-ready, consider these advanced steps:
- Webhooks: What if the user closes their browser immediately after paying, before the
fetchcall finishes? Your DB won't be updated. To handle this, set up a Razorpay Webhook. Razorpay's servers will send a POST request to a hidden Django URL to confirm the payment, acting as a failsafe. - Refunds: The Razorpay SDK allows you to trigger refunds programmatically (
client.payment.refund(payment_id, amount)). Create an admin view to handle this. - Idempotency: Ensure that if a user clicks "Pay" twice rapidly, you don't create two DB orders. Implement django-redis locking or check the DB status before creating a new Razorpay order.